
Copper Connector Machining: Design and Process Decisions
Home
/
Blog
/
Copper Connector Machining: Design and Process Decisions
Copper Connector Machining: Design and Process Decisions
October 22, 2026
Table of Contents
Copper connector machining is a practical engineering decision for buyers responsible for copper electrical connectors. This guide focuses on contact land, cross hole, mounting pattern, connecting these details to the drawing, manufacturing route and first-article review.
Copper connector machining: start with the assembled function
A useful copper connector machining plan begins with what the component must do after installation. For copper electrical connectors, write down the mating interfaces, the direction of the working load and the surfaces that establish position. A drawing that treats every face as equally important often makes inspection more expensive without clarifying whether the part will work. Separate the functional envelope from incidental shape before asking a supplier to recommend a route.
Soft copper can smear at the cutting edge and retain burrs around small holes, compromising clean contact and assembly.
For copper connector machining, the first design review should therefore connect each critical requirement to a visible feature. Ask what would happen if that feature were at either limit of its tolerance. If the answer depends on the mating part, include that information in the review rather than leaving the supplier to infer it from a single component model.
Copper connector machining: turn the design intent into clear drawing requirements
Specify the copper grade and contact interfaces. Keep current-carrying section requirements separate from cosmetic polishing, and give the supplier access to both ends of intersecting holes.
The drawing and model for copper connector machining need a clear order of precedence. Identify the revision, units and general tolerances, then call out exceptions at the feature itself. Do not rely on a shaded CAD image to communicate a surface requirement, an assembled condition or a material treatment. Those details can change the route even when the visible shape remains identical.
When reviewing copper electrical connectors, distinguish a maximum permissible envelope from a target manufacturing value. The supplier should understand which changes need engineering approval. A proposed radius, relief or access hole may make production easier, but its effect on strength, sealing, motion or interchangeability still belongs in the design decision.
Copper connector machining: choose references that survive the manufacturing route
Reference and access review
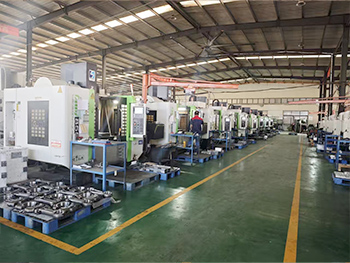
A reference scheme for copper connector machining should be usable during production and meaningful during final inspection. Start from the surfaces that locate copper electrical connectors in the assembly. Review whether those surfaces exist at the first operation and whether later work will change them. Where temporary references are needed, explain how the route transfers to the finished functional references.
Clamping and locating serve different purposes in copper connector machining. Locators establish position; clamps keep the part supported against the process forces. An arrangement that pulls a flexible part into shape may produce a convincing result in the fixture and a different result after release. State the condition in which acceptance measurements are required.
Ask for a setup sketch when the relationship is difficult to understand. It should show contact locations, the direction of restraint and access to the critical features. The sketch does not need to reveal proprietary programming details to be useful. Its purpose is to resolve the physical assumptions that affect the finished interface.
Copper connector machining: match geometry to process access
Sharp, suitable tools and controlled chip evacuation help protect edges. The production plan should explain how burrs will be removed without rounding contact lands or contaminating the surface.
For copper connector machining, consider the complete tool and fixture envelope rather than the cutting tip alone. A feature may be reachable in CAD but blocked by a clamp, neighboring wall or machine component. Review access to the deepest or most restricted area before relaxing a useful tolerance elsewhere. Moving one nonfunctional feature can be more effective than selecting a more elaborate machine.
An economical route for copper electrical connectors should also leave access for cleaning and inspection. Features that become inaccessible after assembly need a defined verification point earlier in the route. This avoids discovering at final inspection that an important internal requirement cannot be checked without disassembly or sectioning.
Copper connector machining: separate geometry, finish and material condition
Treat material condition, dimensional geometry and surface condition as separate decisions in copper connector machining. A smooth surface can still be out of position. A correctly located feature can still have a damaged edge. A certificate for incoming material does not automatically describe the condition after thermal processing, joining or finishing.
For copper electrical connectors, mark the surfaces that need special protection and the edges that affect assembly. Where a coating or treatment changes size, define whether the drawing limit applies before or after that operation. Include any masking requirement explicitly. This gives the supplier a way to plan allowance without guessing which dimensions should be adjusted.
A copper connector machining review should avoid copying an exceptional capability figure onto every feature. Achievable results depend on size, geometry, restraint, material and the full route. Ask the supplier to evaluate the actual requirement and identify any limitation before price or delivery becomes the only subject of discussion.
Copper connector machining: compare design options before the first build
The practical choice in copper connector machining is often between retaining a difficult feature, changing a nonfunctional detail or accepting an additional operation. Compare those options using the same assembly requirement. A cheaper process is not an improvement if it transfers adjustment work or uncertainty to the customer.
Use the comparison below to decide what belongs in the first review of copper electrical connectors. Request a written explanation for a proposed change, including the affected feature and the condition it is intended to improve. Keep the approved drawing as the common reference once a decision is made.
| Feature or decision | Design consideration | Inspection focus | RFQ information |
|---|---|---|---|
| Contact land | Keep conductive contact geometry distinct from appearance | Check flatness and damage | Specify material grade and contact finish |
| Cross hole | Provide access to intersecting edges | Inspect internal burr condition | Define cleaning and deburring scope |
| Mounting pattern | Reference the electrical assembly interface | Check position and fastener engagement | Supply the mating layout |
Use a first article to test the uncertain assumption
Illustrative troubleshooting situation
Two connectors may share an external shape but need different contact finishes. Separate the mechanical drawing from the electrical acceptance requirements so an attractive surface does not substitute for verified function.
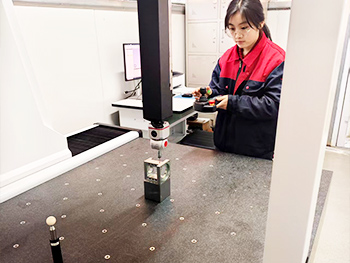
For copper connector machining, use the first article to answer a specific question: does the selected geometry, reference scheme and route produce the required interface? Choose measurements or a fit trial that address that question. A sample made under exceptional conditions is useful for development, but it should not be treated as proof that the production route is stable.
Record what the first build taught you about copper electrical connectors, including any drawing change or process dependency. If the supplier changes the setup, material condition or finish after the trial, decide which evidence needs to be repeated. Keep successful trial measurements linked to the exact revision that produced them.
Copper connector machining: release a complete manufacturing package
Check hole position, flatness and the condition of contact faces. Electrical resistance or conductivity testing needs its own agreed method and cannot be inferred from a photograph or a dimensional report.
Before releasing copper connector machining, check that the package contains the model, drawing, material condition, quantity, critical characteristics and expected inspection evidence. Include known mating constraints and any customer approval points. This is more useful than an open-ended instruction to make the part as accurately as possible.
The final copper connector machining decision should leave both parties able to explain what constitutes an acceptable component. Review unresolved assumptions before ordering the full quantity. If a requirement remains uncertain, identify the trial or engineering decision that will close it instead of hiding the uncertainty in a general note.
Prepare your project for a technical review
Apex lists CNC machining services among its manufacturing services. Send the drawing and requirements for your copper electrical connectors to discuss the actual scope. Use the material overview as a starting point, then confirm the grade, condition and project-specific feasibility in the quotation.
For further process background, see Sandvik Coromant milling application guidance. Apply tooling or joining guidance to the actual material and setup with the responsible manufacturing team. These references do not replace the approved component drawing or an application-specific qualification.
For a focused copper connector machining discussion, send the current model and drawing, quantity, material condition, critical interfaces and required delivery window through the form below. Identify the main uncertainty described in this guide so the engineering review can address it directly. Contact Apex Precision to request a project review and quotation.
Frequently asked questions
What is the main risk in copper connector machining?
Soft copper can smear at the cutting edge and retain burrs around small holes, compromising clean contact and assembly. Review this risk against the actual geometry and mating interfaces before selecting tolerances.
What drawing information is needed for copper connector machining?
Specify the copper grade and contact interfaces. Keep current-carrying section requirements separate from cosmetic polishing, and give the supplier access to both ends of intersecting holes.
Can copper connector machining use a standard process route?
Sharp, suitable tools and controlled chip evacuation help protect edges. The production plan should explain how burrs will be removed without rounding contact lands or contaminating the surface. The final route needs review against the actual drawing and quantity.
Which checks should be planned before production?
Check hole position, flatness and the condition of contact faces. Electrical resistance or conductivity testing needs its own agreed method and cannot be inferred from a photograph or a dimensional report.
When should a design change be approved?
Approve a change before the supplier incorporates it into the first article or production lot. Record its effect on the mating interface, material condition and acceptance requirements, then update the controlled revision.
Latest News
Contact Us
FAQ
What types of parts can be machined?
We can machine a wide range of high-precision CNC parts for automotive, aerospace, medical devices, industrial machinery, and automation equipment, including complex geometries and custom non-standard parts.
What is the machining accuracy?
We can achieve high-precision machining with ±0.005mm tolerance and ensure consistent quality through our strict quality control system.
Can you provide small-batch and prototype manufacturing services?
Yes, we support small-batch production and prototype machining, with flexible scheduling to meet urgent client requirements.
Do you offer customized processing solutions?
Yes, we provide customized solutions with one-on-one technical support, from design review and process optimization to final machining.
How long does delivery usually take?
Delivery time depends on part complexity and quantity, typically within 1-6 weeks. We provide a detailed schedule upon order confirmation.
What certifications are available for quality management systems?
We hold ISO 9001, ISO 14001, and ISO 45001 certifications, strictly following international quality, environmental, and safety standards.
How long does delivery usually take?
Delivery time depends on part complexity and quantity, typically within 1-6 weeks. We provide a detailed schedule upon order confirmation.